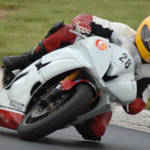
Whether you are a new rider in the Beginner group, or a more experienced rider in Advanced, you should always be looking for ways to improve your riding. In this article, I describe a method any rider can use to work on improving their corner entry speed. This is the technique I began using as an Intermediate group rider and still use today as a NESBA control rider and WERA expert racer.
About 20 days into my trackday “career”, the progression of my riding skill had stagnated. I’d been in Intermediate for some time and failed to make any improvement in my lap times. With each riding session, I entered the track determined to improve some aspect of my riding, whether it be my body position, braking transitions, or ultimately my corner speed. Despite my efforts, I was making little or no improvement. The reason (I later discovered) was that I was still riding by feel and had no measureable sense of what I was actually doing on the track. If I cannot be sure of what I am doing, how do I know how to improve upon it? I decided that I had to come up with a plan and add a little precision to my approach. I decided to first work on improving my corner entry speed. This is what I did:
1 – I noticed that my throttle-to-brake transition was initially quite long. I would ease off the throttle, coast a bit, and then ease on the brakes. There was no precision in my technique. I decided to add precision by making my transition period between full-throttle to full-brake as short as possible. There was no time wasted coasting, and I eliminated much uncertainty about when I was actually getting to full brake pressure.
2 – I was uncertain where I was transitioning onto the brakes. I ran a few laps and took note of THE LAST POINT ON THE STRAIGHTAWAY AT WHICH I HAD THE THROTTLE PINNED. This was my starting brake marker. NESBA makes a practice of laying out marker cones in the braking zones, so finding a precise marker was easy. Now I knew where I was starting my transition to the brakes and was making that transition quickly and precisely.
3 – After a few good laps, I took note of my turn in point. As with the braking zone, the turn in for the corner was marked with an orange cone. I noted how far before or after the cone I first applied pressure to the handlebar.
4 – Now that I had a brake marker, a precise throttle-to-brake transition, and a turn in marker, I set about making changes to improve my corner entry speed. It was as simple as braking later and making no change to my throttle-to-brake transition or turn in mark. The uncertainty had been eliminated from this equation. I knew in absolute terms that I could safely make the turn with my initial marker. I had just done so dozens of times. By moving my turn-in mark forward just a small amount, I had noticed that my corner entry speed would increase as a result.
As I became more accustomed to this technique, I’d start braking just a few feet later as my confidence grew. Since any changes I made were minor, there was no overriding fear and I remained in control of the bike, successfully navigating the turn each time. I continued moving my brake marker throughout the day and, for the first time in a long while, I was able to make a noticeable improvement in my riding.
The day I began using this technique was a breakthrough for me. Seat time only gets you so far, unless you know what to do with it. Taking a more deliberate and calculated approach to improve one specific aspect of my riding worked phenomenally well. It was on this day that I decided to try and understand exactly what I was doing at every point on the track, from where I started braking, where I turned in, to where I apexed, where I stopped braking, where I got on the throttle, and where I was looking as I performed all of these tasks. Once I understood what I was doing, I could do it repeatedly and consistently, as well as make incremental and safe changes to improve my riding.
